

How To Activate Face Recognition On Windows 10
Z7_3054ICK0KGTE30AQO5O3KA30N0
hp-concentra-wrapper-portlet
![]() Actions
Actions
HP PCs - Troubleshooting Windows Hello Face Recognition
This certificate is for HP computers with an infrared (IR) camera and Windows 10.
Windows Howdy Face up Recognition does not piece of work. The infrared (IR) camera might not turn on, the feature might hang, or one of the following mistake messages might display:
-
Sorry, something went incorrect. Couldn't turn on the camera. Make certain it's working properly.
-
Sorry something went incorrect. Please sign in with your PIN.
This event sometimes occurs subsequently a Windows update.
annotation:If you lot have never set Windows Howdy Face Recognition and the option to set upwards the feature does non display in Settings, make sure your PC has an IR camera. The choice to set up Face Recognition does non brandish if the PC does non have an IR camera.
Footstep ane: Uninstall and reinstall the IR camera driver
Reinstalling the IR camera driver might resolve the consequence. Uninstall the driver in Device Manager, and and then reinstall the commuter from HP Customer Support.
-
Using the search box on the taskbar, search for and open Device Managing director.
-
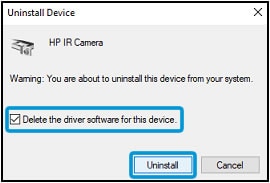
In the Device Managing director window, double-click Imaging devices, right-click the proper name of the IR camera, and and so select Uninstall device.

-
Select Delete the driver software for this device, and then click Uninstall.
-
On the Software and driver results page for your PC model, download and install the driver for the IR camera.
Restart your PC by shutting it down and then manually turning information technology on to meet if Windows Hello Face Recognition works. If the issue persists, proceed to the adjacent step.
Step 2: Remove the Confront Recognition and PIN sign-in settings
In Settings, remove your Face Recognition and PIN settings from the sign-in options.
-
Click Start
 , and then click Settings
  .
. -
Click Accounts.

-
On the Settings menu, click Sign-in options.

-
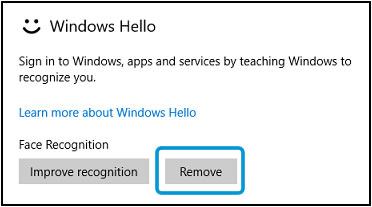
In the Windows Hello expanse under Face Recognition, click Remove.
-
In the PIN area, click Remove, and so click Remove again to confirm.

-
Type your password in the Password field, and then click OK.

Continue to the next step to clear the Trusted Platform Module (TPM).
Step 3: Clear the Trusted Platform Module (TPM)
Clearing the keys from the TPM might resolve the issue. Support your information, disable apps and security features that employ the TPM, and so use the TPM management tool to clear the TPM.
circumspection:Clearing the TPM can event in information loss. Support all important data (such as personal files, photos, videos, documents, applications, software) before beginning to avoid any possibility of losing your data. Encounter Backing Upwardly Your Files (Windows 10, viii) for more information.
-
Disable or suspend all apps that apply the TPM, for instance, BitLocker.
-
Restart the estimator and press Esc repeatedly, almost once every 2d, until the Startup Carte du jour opens.
-
When the Startup Menu displays, printing F10 to open up BIOS Setup.
-
Employ the right arrow central to cull Security.
-
In the Security or System Security settings, disable the following security features, if they are listed.
-
Intel Software Guard Extensions (SGX)
-
Intel Trusted Execution Engineering science (TXT)
note:
BIOS configurations vary. Refer to the documentation that came with your PC for specific steps to navigate the BIOS and disable the settings.

-
-
Relieve your changes and go out the BIOS.
-
Sign in to an ambassador business relationship.
-
Using the search box on the taskbar, search for and open Run.
-
In the Open up field, type tpm.msc, and then click OK.
If a User Account Control window displays, click Yes.
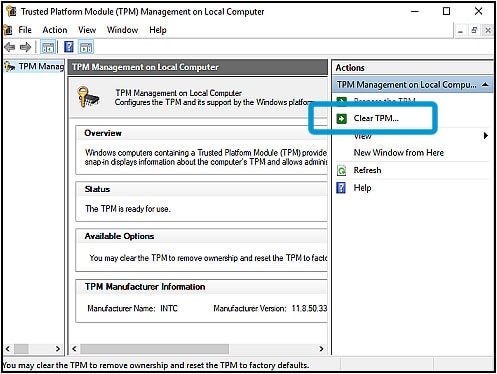
The TPM management window opens.

-
In the Actions section, click Clear TPM.
-
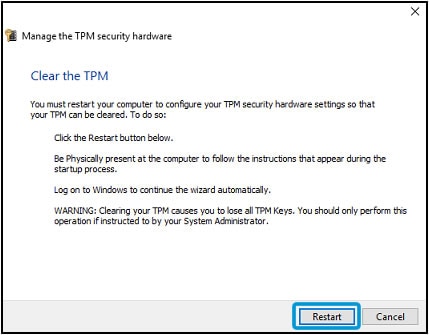
Click Restart.
note:
You must exist physically present to reply to prompts during the TPM immigration process.
-
Follow the on-screen instructions to clear the TPM.
-
If you disabled security features such every bit Intel Trusted Execution Engineering (TXT) or Intel Software Guard Extensions (SGX) in the BIOS earlier immigration the TPM, re-enable them.
notation:
If the feature was set to Software Controlled, set it to Software Controlled once more.
Continue to the next step to prepare up Pin and Face up Recognition settings.
Pace iv: Add a Pin and set up Confront Recognition
Utilize the sign-in options in Windows Settings to add a Pin and set Confront Recognition.
-
Click Start
, and then click Settings . -
Click Accounts.
-
On the Settings menu, click Sign-in options.
-
In the PIN area, click Add.

-
Type your countersign in the password box, and so click OK or Sign in, depending on your business relationship type (local or MSA).


-
Blazon in a PIN, confirm information technology, and and so click OK.
Windows adds the PIN.

-
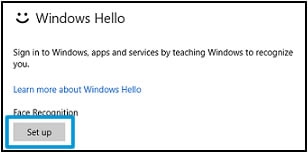
In the Windows Hello surface area under Face Recognition, click Set.
-
Click Get started.

-
Type your Pin or countersign in the Pin or Countersign field.

-
When the camera screen displays, position yourself and so your face displays in the center of the window, and then concord yet until the All fix! window displays.
-
Click Shut.

Restart your PC by shutting it down and and then manually turning information technology on to see if Windows Hello Face Recognition works. If the outcome persists, keep to the side by side stride.
Footstep five: Perform a organization reset
If none of the above deportment resolved the issue, support your personal data, and then reset your computer by reinstalling the operating system. Get to Resetting Your Computer (Windows ten) for more than information.
If reinstalling the operating system did not resolve the issue, keep to the next step.
Source: https://support.hp.com/us-en/document/c05873680
Posted by: branchcouchisem.blogspot.com
0 Response to "How To Activate Face Recognition On Windows 10"
Post a Comment